Jeep CJ5 Restoration Guide: An Overview
This comprehensive guide details the complete restoration of the iconic Jeep CJ5, covering disassembly, repair, and reassembly with detailed illustrations and step-by-step instructions․
Understanding the CJ5’s History & Significance
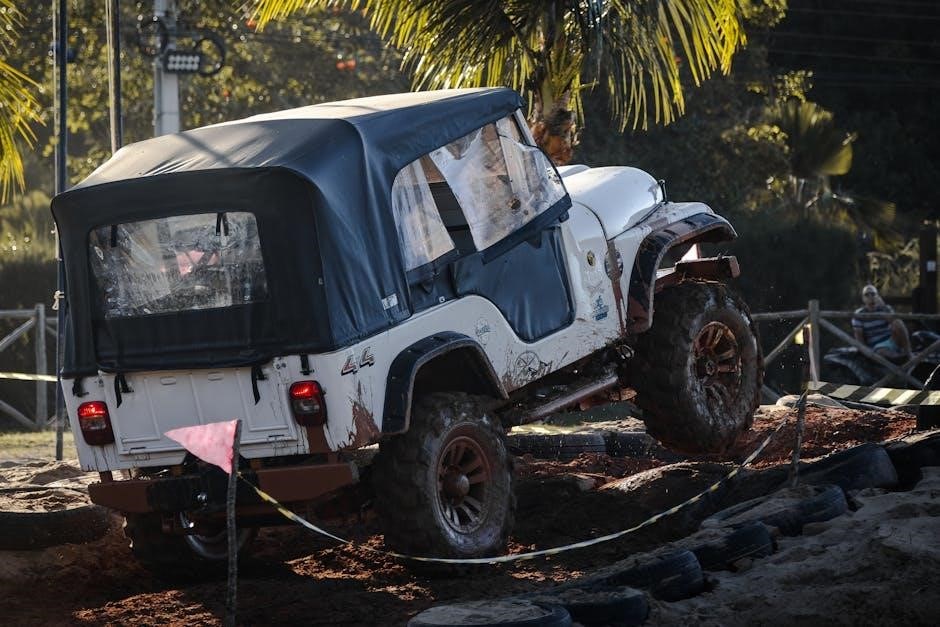
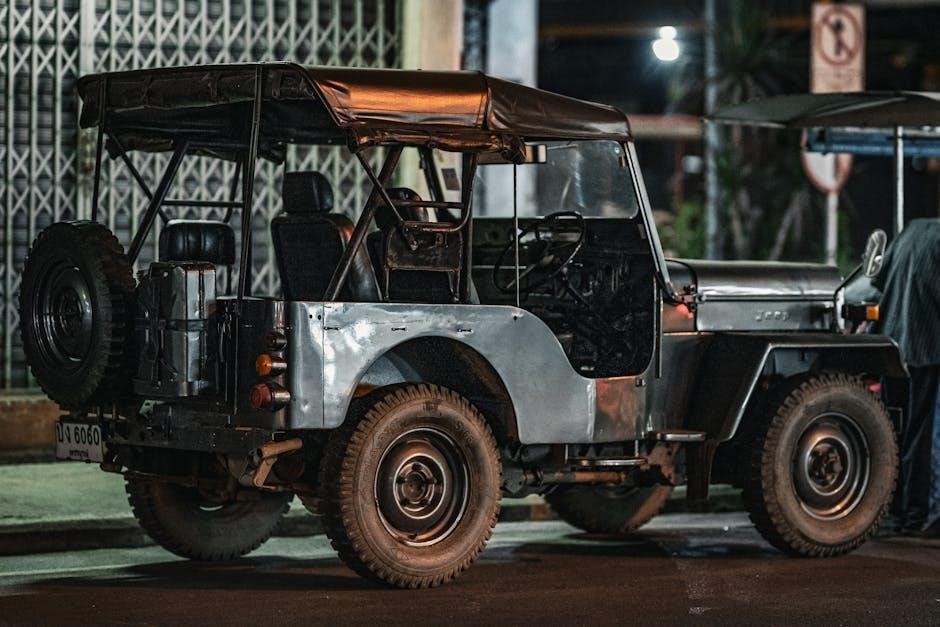
The CJ5, debuting in 1955, bridged military robustness with civilian appeal․ Essentially a civilianized M38-A1, it retained key military features like the dual battery and snorkel provision, showcasing Jeep’s pragmatic design․ This model’s longevity—spanning several decades—solidified its place as a cornerstone of off-road culture, making restoration a rewarding endeavor for enthusiasts seeking to preserve a piece of automotive history․
Initial Assessment & Disassembly
Begin with a thorough inspection, documenting all existing conditions․ Careful, safe disassembly is crucial, noting fastener locations and component arrangements for simplified reassembly later․
Documenting the Vehicle’s Condition
Meticulous documentation is paramount before starting any restoration work․ Photograph every angle of the Jeep, focusing on rust areas, damage, and existing modifications․ Create a detailed inventory of all parts, noting their condition and location․ Record serial numbers, date codes, and any unique identifiers․ This comprehensive record will prove invaluable during reassembly, ensuring accuracy and aiding in sourcing correct replacement parts, especially for originality․
Safe Disassembly Procedures
Prioritize safety during disassembly! Always disconnect the battery before commencing work․ Support the vehicle securely with jack stands on a level surface․ Use penetrating oil liberally on rusted bolts and fasteners․ Label and organize all removed parts to prevent loss or confusion․ Wear appropriate safety gear, including gloves and eye protection, throughout the process․
Frame Restoration
A solid frame is crucial; thoroughly inspect for rust and damage, then employ repair and reinforcement techniques to ensure structural integrity for years of reliable use․
Frame Inspection for Rust and Damage
Begin with a meticulous inspection of the entire frame, paying close attention to common rust areas like the spring perches, body mounts, and areas exposed to road salt․ Utilize a wire brush and scraper to remove loose paint and reveal underlying corrosion․
Probe suspect areas with a screwdriver; solid metal indicates good condition, while soft or crumbling metal signifies significant rust damage requiring repair or section replacement․ Document all findings with photographs for reference during the restoration process․
Frame Repair and Reinforcement Techniques
For minor rust, grinding and welding patches are effective, ensuring proper metal preparation and weld penetration․ Severely damaged sections may necessitate cutting and splicing in new frame rails, requiring precise measurements and welding skills․ Reinforce repaired areas and high-stress points with gussets or plating to enhance structural integrity․
Consider boxing the frame for increased rigidity, especially for modified or lifted CJ5s․
Bodywork & Panel Repair
Addressing rust is crucial; metal fabrication skills are needed for patch panels․ Proper panel alignment ensures a quality fit, and replacement is viable for irreparable damage․
Rust Repair and Metal Fabrication
Extensive rust is a common challenge in CJ5 restorations, demanding careful assessment and skilled metalwork․ Patch panels, often custom-fabricated, are welded into place to replace severely corroded sections․ Techniques include cutting away affected metal, shaping new panels to match the original contours, and ensuring proper welding to maintain structural integrity․ Preparation is key, cleaning metal thoroughly before applying rust converters and primers to prevent future corrosion․ Successful rust repair requires patience, precision, and a solid understanding of metalworking principles․
Panel Alignment and Replacement
Achieving proper panel alignment is crucial for a visually appealing CJ5 restoration․ Damaged or irreparable panels require careful removal and replacement with new or good-condition used parts․ Precise fitting is essential, often involving shimming, adjusting, and minor metal adjustments to ensure seamless gaps and flush surfaces; Welding or riveting secures the new panels, followed by body filler to smooth imperfections and prepare for paint․
Drivetrain Restoration
Restoring the drivetrain involves a complete engine rebuild or replacement, alongside a thorough overhaul of the transmission and transfer case for optimal performance․
Engine Rebuild or Replacement
Deciding between a rebuild and replacement hinges on the engine’s condition and budget․ A rebuild necessitates a complete disassembly, cleaning, and inspection of all components, followed by machining and new parts installation․ Replacement offers quicker results, potentially with a more modern or powerful engine, but may deviate from original specifications․ Thoroughly assess the block for cracks and wear before committing to either path, ensuring compatibility with the CJ5’s existing systems․
Transmission & Transfer Case Overhaul
A complete overhaul of the transmission and transfer case is crucial for reliable performance․ This involves disassembly, inspection for worn gears, bearings, and seals, and subsequent replacement․ Pay close attention to synchronizers in the transmission and chain/gear condition within the transfer case․ Proper lubrication and adjustment are vital post-rebuild, ensuring smooth shifting and optimal four-wheel-drive engagement․
Suspension & Steering
Restoring the suspension and steering ensures safe handling and ride quality․ This includes leaf spring replacement, shock absorber renewal, and thorough inspection of steering components․
Leaf Spring Replacement & Reconditioning
Worn leaf springs significantly impact ride quality and handling․ Thoroughly inspect springs for cracks, sagging, or broken leaves; replacement is often necessary․ Reconditioning involves cleaning, inspecting, and potentially re-arching springs, though this requires specialized equipment․ Ensure proper shackle and U-bolt replacement during installation for optimal performance and safety․ Correct spring alignment is crucial for vehicle stability․
Steering System Inspection & Repair
A safe and responsive steering system is paramount․ Inspect all components – steering box, tie rod ends, drag link, and steering wheel – for wear and play․ Rebuild or replace the steering box if necessary, ensuring proper gear mesh․ Replace worn tie rod ends and drag link components․ Check and adjust steering geometry for accurate tracking and minimal wander, prioritizing safety․
Braking System Restoration
Restoring the braking system ensures safety․ This involves replacing brake lines, overhauling master cylinders, calipers, and wheel cylinders for reliable stopping power․
Brake Line Replacement
Carefully inspect all brake lines for corrosion, damage, or leaks during the restoration process․ Replacement with new, DOT-approved lines is crucial for safety and reliability․ Proper flaring and fitting techniques are essential to prevent future failures․ Bleeding the system thoroughly after line replacement removes air bubbles, ensuring optimal brake pedal feel and stopping performance․ Use appropriate tools and follow safety precautions․
Brake Component Overhaul (Master Cylinder, Calipers, Wheel Cylinders)
A complete overhaul of brake components is vital for a safe restoration․ Rebuild or replace the master cylinder, calipers, and wheel cylinders with new seals and hardware․ Inspect bores for damage․ Ensure proper functionality before reassembly․ Thorough cleaning and lubrication are essential․ Bench bleeding the master cylinder before installation is highly recommended for optimal performance․
Electrical System Rewiring
Rewiring ensures safety and reliability․ Inspect the harness, repair damaged sections, test all components—lights, gauges, and the starter—and replace as needed for proper function․
Wiring Harness Inspection & Repair
Thoroughly inspect the Jeep CJ5’s wiring harness for brittle insulation, corrosion, and damaged wires․ Carefully trace each circuit, noting any breaks or modifications․ Repair damaged sections by splicing in new wire, using proper connectors, and ensuring secure connections․ Document all repairs meticulously; a complete wiring diagram is invaluable during this process, aiding in accurate reassembly and troubleshooting future electrical issues․
Component Testing & Replacement (Lights, Gauges, Starter)
Systematically test all electrical components – lights, gauges, and the starter – for functionality․ Utilize a multimeter to verify voltage and continuity․ Replace any faulty components with new or refurbished units, ensuring compatibility with the CJ5’s electrical system․ Proper grounding is crucial; clean and secure all ground connections to prevent erratic behavior and ensure reliable operation of all electrical accessories․
Interior Restoration
Revitalize the CJ5’s interior with new seat upholstery and a restored dashboard․ Focus on accurately replicating the original aesthetics for a truly authentic restoration․
Seat Upholstery & Replacement
Original CJ5 seats often show significant wear, requiring either careful restoration or complete replacement․ When replacing, prioritize materials that accurately match the original vinyl or fabric patterns and colors․ Consider the seat foam condition; replacement foam ensures comfort and proper seat shape․ Pay close attention to mounting hardware, cleaning or replacing as needed to secure the seats correctly․ Accurate detailing contributes significantly to the overall authenticity of the restoration․
Dashboard & Instrument Panel Restoration
The CJ5 dashboard and instrument panel often suffer from cracking and fading due to sun exposure․ Careful cleaning and color matching are crucial for repair․ Instrument lenses can be polished, while gauges require testing and potential rebuilding․ Wiring behind the dash needs thorough inspection for damage and proper connections․ Replacement of damaged components ensures functionality and a restored aesthetic․

Exterior Restoration: Paint & Trim
Achieving a flawless finish requires meticulous body preparation, including rust repair and priming, followed by careful paint application and the reinstallation of trim pieces․
Body Preparation for Painting
Thorough preparation is crucial for a lasting paint job․ Begin with complete rust removal using media blasting or chemical treatments, followed by metal fabrication for damaged areas․ Ensure all body panels are aligned correctly, addressing any dents or imperfections with body filler․ Apply multiple coats of primer, sanding between each layer to create a smooth, even surface ready for the final color coats, guaranteeing optimal adhesion and a professional look․
Paint Application & Finishing
Apply several thin coats of your chosen paint, allowing each to dry before the next․ Utilize a high-quality automotive paint and appropriate spray equipment for consistent coverage․ Once the color coats are complete, apply multiple layers of clear coat for protection and shine․ Wet sanding and polishing refine the finish, removing imperfections and achieving a deep, glossy appearance, ensuring a durable and beautiful result․
Soft Top & Hardtop Restoration
Restoring tops involves repairing or replacing fabric, frames, and seals․ Ensuring a weatherproof fit is crucial, alongside addressing rust on hardtop structures․
Soft Top Fabric & Frame Repair
Addressing a worn soft top begins with inspecting the fabric for tears and UV damage, necessitating patching or complete replacement․ The frame requires scrutiny for bends, rust, and broken joints; straightening, welding, or component replacement may be needed․ Proper tensioning is vital for a secure fit, and new seals prevent leaks․ Careful attention to detail ensures a functional and aesthetically pleasing soft top restoration, preserving the CJ5’s classic look․
Hardtop Restoration & Sealing
Restoring a CJ5 hardtop involves addressing rust, dents, and damaged fiberglass or metal․ Repairing or replacing windows and latches is crucial for functionality․ Thorough cleaning and preparation are essential before applying a fresh coat of paint․ Proper sealing around the windows and roofline prevents leaks, ensuring a weatherproof cabin․ Careful restoration maintains the hardtop’s structural integrity and classic appearance․
Wheels & Tires
Original wheel restoration involves cleaning, repairing damage, and repainting․ Tire selection offers choices between period-correct options or modern tires for improved performance․
Wheel Restoration & Painting
Restoring original wheels begins with thorough cleaning to remove years of grime and rust․ Inspect for dents or cracks, requiring professional repair if significant damage exists․ Media blasting prepares the surface for primer and paint, ensuring proper adhesion․ Authentic color matching is crucial for originality, often utilizing factory Jeep wheel paint codes․ Apply several coats of primer, followed by the color coat, and finally a clear coat for durability and shine․
Tire Selection for Originality or Modern Use
Choosing tires impacts both appearance and performance․ For a truly original restoration, research the tire size and style originally fitted to your CJ5 model year; Modern radial tires offer improved handling and ride comfort, but deviate from period correctness․ Consider bias-ply tires for authenticity, acknowledging reduced on-road performance․ Balancing aesthetics with drivability is key․
Final Assembly & Testing
Carefully reassemble the CJ5, adhering to torque specifications․ Thorough road testing and adjustments are crucial to ensure optimal performance and identify any remaining issues․
Torque Specifications & Fastener Replacement
Precise torque is vital during reassembly; consult a CJ5-specific manual for correct values for every bolt and nut․ Replace all original fasteners with new, grade-8 hardware to ensure reliability and prevent future failures․ Using the correct torque prevents damage and guarantees component longevity, contributing to a safe and dependable restoration․
Road Testing & Adjustments
After assembly, thorough road testing is crucial to identify any remaining issues․ Check for leaks, unusual noises, and proper operation of all systems․ Adjust the steering, brakes, and engine as needed for optimal performance․ Monitor temperatures and fluid levels during extended drives to confirm a successful restoration․
Resources & Parts Sourcing
Locate parts through online Jeep forums, communities, and reputable suppliers․ Quadratec and dedicated restoration parts vendors offer essential components for your CJ5․
Online Forums & Communities
Engage with fellow CJ5 enthusiasts on dedicated online forums; these platforms are invaluable resources for restoration knowledge․ Share experiences, ask questions, and benefit from the collective wisdom of Jeep owners who have tackled similar projects․ These communities often host parts for sale, offering unique and hard-to-find items, plus invaluable technical advice and support throughout your restoration journey․
Reputable Parts Suppliers
Sourcing quality parts is crucial for a successful CJ5 restoration․ Quadratec and other specialized Jeep parts suppliers offer a wide range of components, from body panels to drivetrain parts․ Prioritize suppliers with strong reputations for accuracy and customer service, ensuring you receive correct and reliable parts for your Jeep’s restoration project, maintaining authenticity․
Common CJ5 Restoration Challenges
Restoring a CJ5 often involves extensive rust repair and locating original parts, which can be difficult due to age and limited availability of specific components․
Dealing with Extensive Rust
Rust is a prevalent issue in CJ5 restorations, often found in the frame, body panels, and floorboards․ Thorough inspection is crucial, utilizing methods like media blasting to reveal hidden corrosion․ Repair options range from patching smaller areas with weld-in panels to completely replacing severely damaged sections․
Proper rust removal and preventative measures, such as applying rust converters and protective coatings, are essential for long-term durability and structural integrity․
Finding Original Parts
Sourcing original CJ5 parts can be challenging, requiring patience and resourcefulness․ Online forums and dedicated Jeep communities are invaluable for locating rare components․ Reputable parts suppliers specializing in vintage Jeeps offer a range of original and reproduction parts․
Swap meets and salvage yards can also yield hidden treasures, but careful inspection is vital to ensure usability and authenticity․
Upgrades & Modifications (Maintaining Originality)
Sensible performance and safety upgrades are possible while preserving the CJ5’s classic character, enhancing drivability without sacrificing its original appeal and charm․
Sensible Performance Upgrades
For improved performance, consider a mild engine upgrade, retaining the original engine family for ease of maintenance and originality․ Disc brake conversions significantly enhance stopping power, a crucial safety improvement․ Upgraded suspension components, like shocks and bushings, offer better handling and ride quality without drastically altering the CJ5’s character․
Modernizing for Safety & Comfort
Enhance safety with modern seatbelts and a roll bar, crucial additions for older vehicles․ Consider a steering upgrade for improved responsiveness and comfort on longer drives․ Modern lighting, including LED headlights, dramatically increases visibility․ Retain the CJ5’s classic aesthetic while incorporating subtle comfort upgrades for a more enjoyable experience․